
An unorganized Outlook inbox is no good if you’re running a small business or just have a busy life. Organize your inbox and don’t miss important emails!
Here, I’ll show you how to create folders, categories, and rules all on Outlook on the Web.
This article is about how to create folders, categories, and rules for Outlook on the Web. If you’re looking for a different email service or Outlook PC version, check out our other blog posts that are specific to those. (Gmail and outlook for PC)
Folders
- To create a folder on Outlook on the web, look to the left menu and select the “folders” tab. At the bottom of that tab, click “new folder”
- Name and create your new folder.
- Select an email or multiple emails and drag and drop into the new folder!
You can also drag and drop the folder into another folder to create a subfolder.
Categories
Like labels in Gmail these mark an email into a specific category that you create so you know what type of email it is right away.
- Select an email or multiple emails
- On the top menu bar (where delete, archive, and junk it) click the “categorize” tab.
- Click “new category” (or right-click an existing one and rename it) and then name it and select its color and hit “save”
Once you hit “save” it will automatically assign the selected email(s) to the category you just created. These categories show up under the subject line in your inbox and help you to quickly recognize what type of email it is.
TIP: You can add several categories to the same email
Rules
These rules are very helpful when you want certain emails to be filed away into its assigned folder right when it hits your inbox. When you want to make sure every email from a specific person goes straight to important, or if you want every email with “Old Navy” in the subject line to go straight to the trash, the customization is endless! Here’s how to create these rules
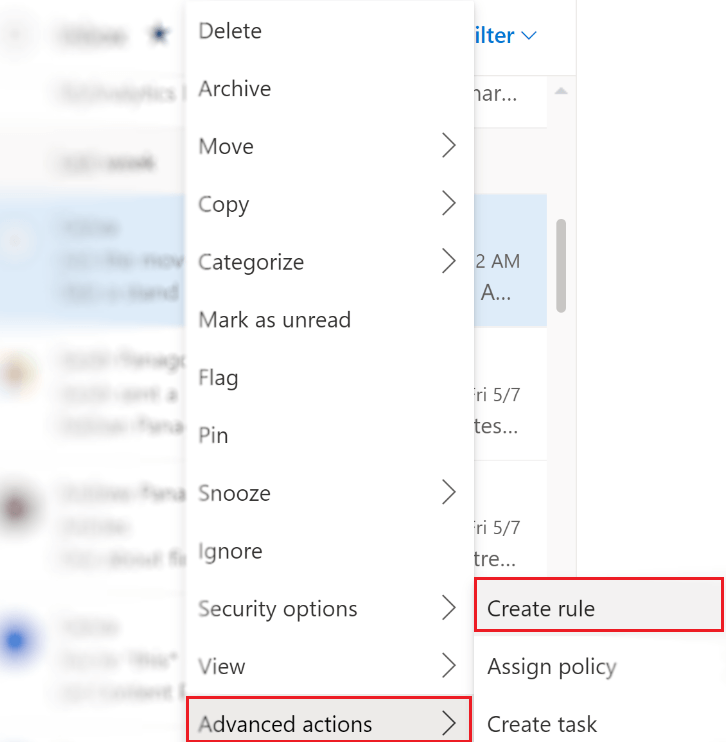
- Right-click an email and at the very bottom of this menu is the button “Advanced actions”
- Click “create rule” and it will open a little box and ask you what folder to move to.
NOTE: Now, this box automatically has the criteria as “Any messages from this sender” will be “moved to” a certain folder which you specify. These criteria can be changed and customized to what you need by clicking “more options”.
- Select which folder you want or create one and click “ok”
Once you click “ok” it will apply this rule to all existing emails and all future emails. Meaning every email you have in your inbox with the criteria you specified will have the action applied to them. If you selected “move to” then your inbox will become a little more empty since those emails were moved to a different folder. They haven’t been deleted (unless you selected “move to trash”), they just moved.
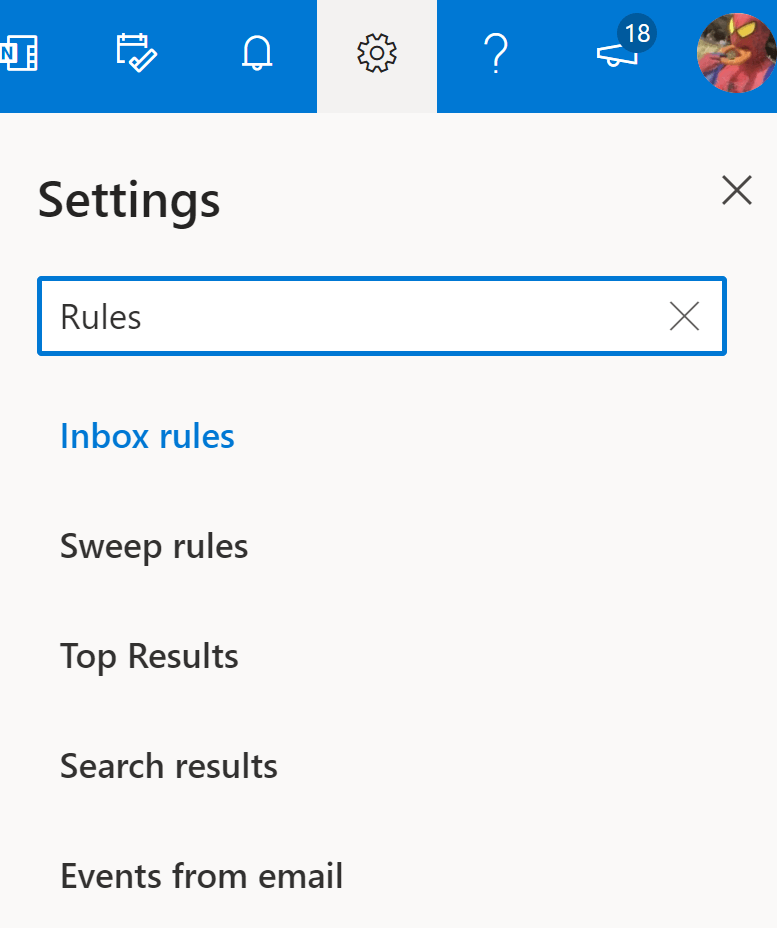
TIP: You can add, delete, and manage all the rules you create under settings
- Open settings and search “rules”
- Select “inbox rules” There you’ll be able to create more, delete, or edit the existing rules.
Even though outlook has a couple different versions, what you do in one version will apply to all the rest. So by making these folders, categories, and rules, it will also be in the PC version and on iOS & android versions. No need to repeat the process over and over again for each.
Here’s how to create folders, categories, and rules on Outlook PC version.


0 Comments